

(under construction)
| Set the Length | Labeling | Cutting | Carrying |
| Setting the Length |
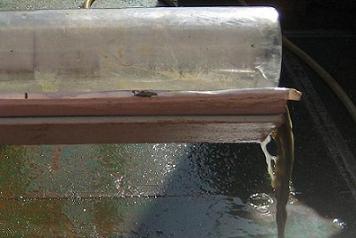 After laying the core liner in the trough and wiping it dry with rags, you will need to "set" the length. That means determining where the core actually begins -- taking into account that it may have stretched some during the extraction. There will usually be some water in the top of the core. First you need to drain the water so you can clearly see where the sediment begins. 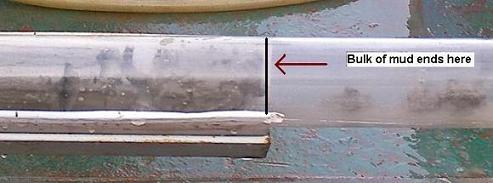
Next you will need to mark the liner at the point the core sediment actually begins. |
| Labeling the Sections |
After laying the core liner in the trough and wiping it dry with rags, mark the liner in three foot sections starting at the surface of the sediment (the sediment/ water interface). The surface to three feet down is section one. Three feet to six feet down is section two, etc. Use the 3 ft marking tool to mark the sections. 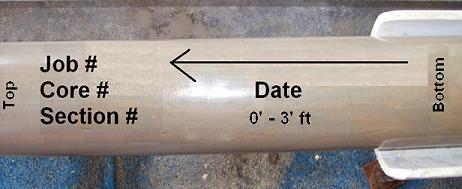 Label each section on the core liner with Job #, Core ID, Section #, Top depth, Bottom Depth, and date with an arrow pointing to the top of the section. |
| Cutting the Sections |
 Once the sections are marked, it's time to cut the liner. It helps to keep the liner cutter, wire for cutting the sample, some dry rags and a box of red caps next to the trough. Once the sections are marked, it's time to cut the liner. It helps to keep the liner cutter, wire for cutting the sample, some dry rags and a box of red caps next to the trough.
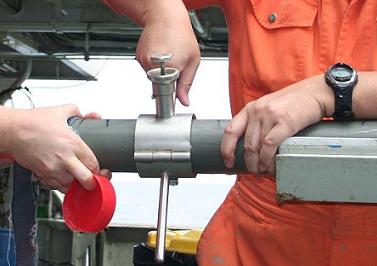
It takes two people to cut the liner. One person to hold the liner so it doesn't spin and another person to rotate the liner cutter. Once the liner is cut, a wire is used to make a clean cut through the sediment. Then each section is capped. 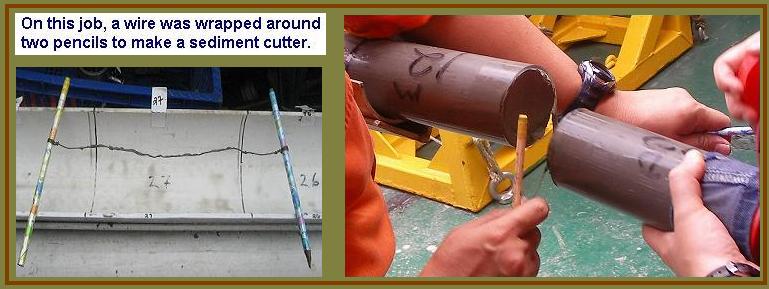 After cutting each section, tape the top cap with two or three wraps of electrical tape. Tape the bottom cap firmly to the core liner. |
| Carrying the Sections |
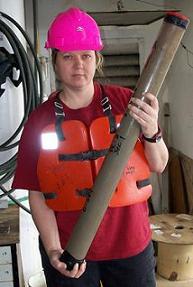
After taping the caps, carry the section into the lab with one hand supporting the bottom cap. The caps fit a little loosely and could slip off under the weight of the mud. Place them upright in the piston core racks in the lab. |